Connect Google Tag Manager to your store, then use it to set up Google Analytics 4.
Google Tag Manager manages the tracking codes on your website or app. Those codes are called tags. You add one small piece of Google Tag Manager code to your site. After that you control Google Analytics, ads and other tracking tools from a web interface, without changing the code each time.
Before you start
- Google Tag Manager is a powerful tool. It is strongly advised that advanced users set it up. You can add TikTok, Google Ads and Snapchat tracking with it.
- See the list of supported integrations.
Steps
Create a Google Tag Manager account
-
Go to tagmanager.google.com.
-
Log in, or create a new Google account.
-
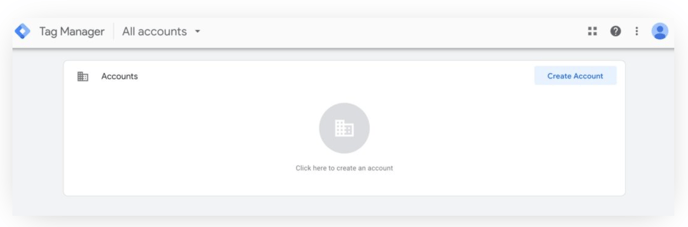
Click Create Account.
-
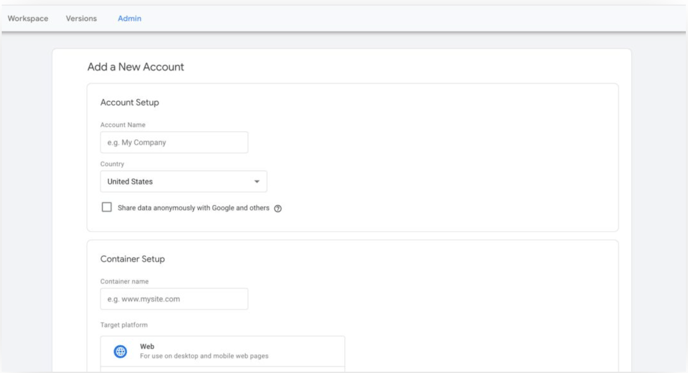
Enter your company name and location, and choose whether to share anonymous data.
-
Enter a container name and choose Web.
-
The terms and conditions page opens. Click Yes.
-
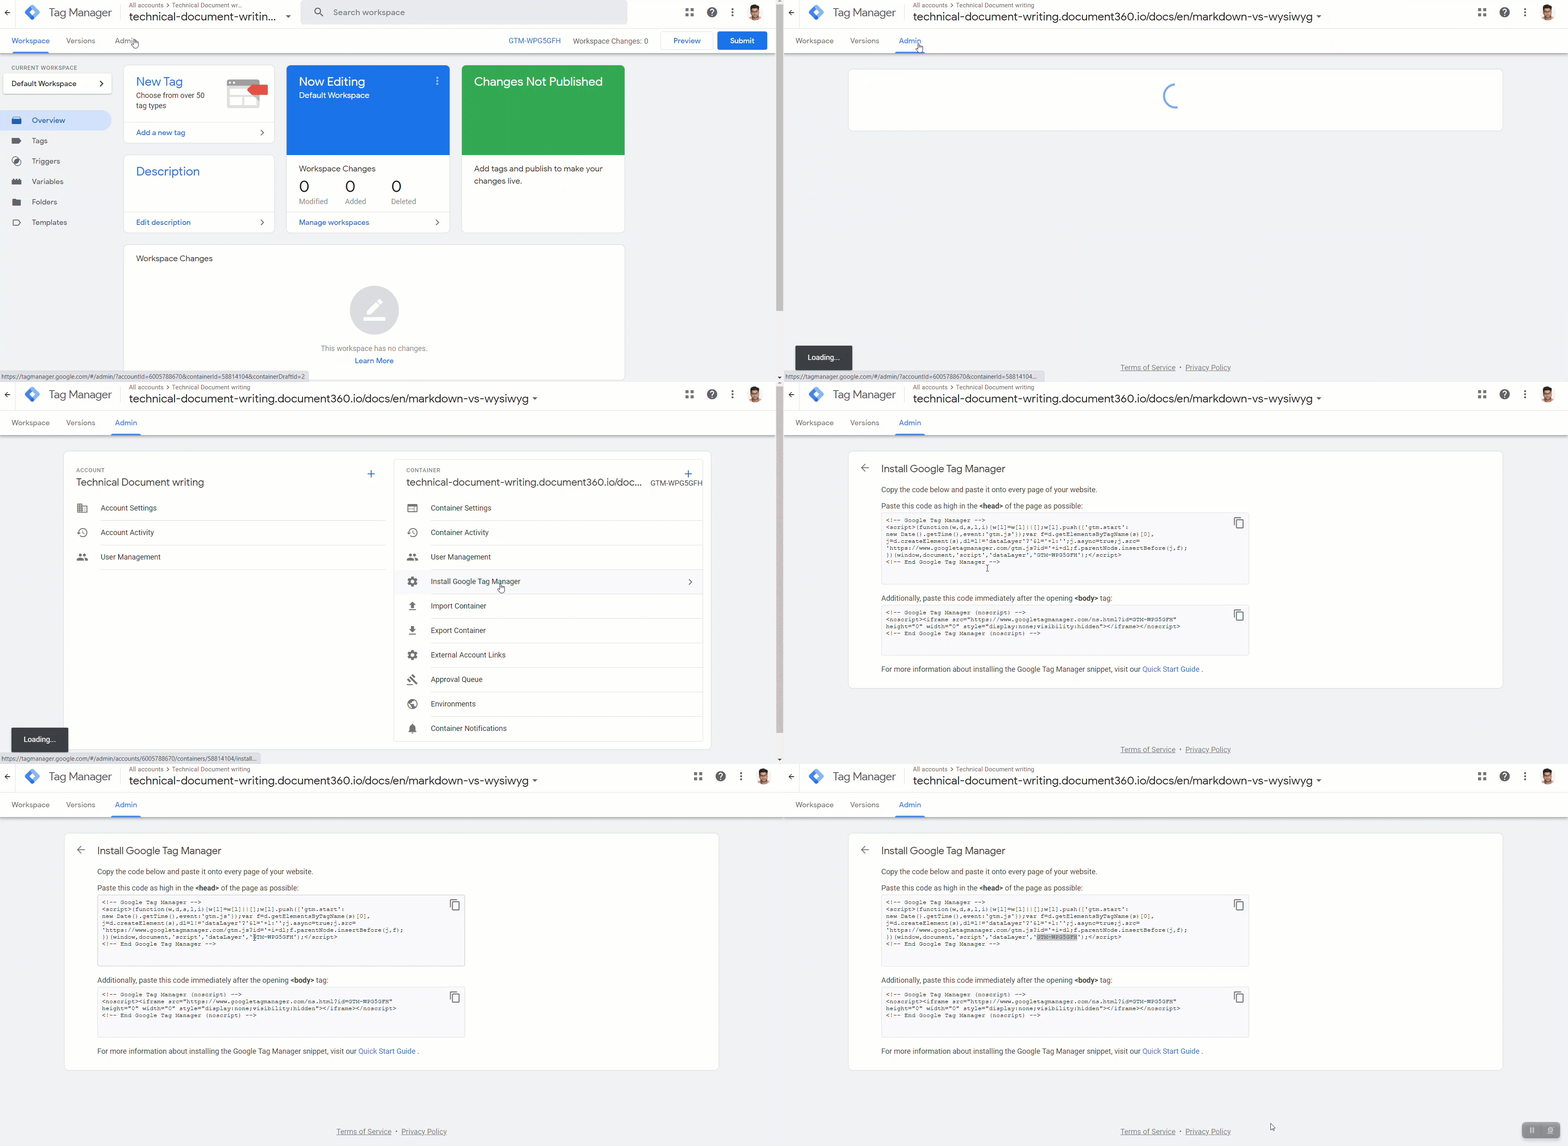
Copy the Tracking ID shown on the next page.
Connect it to your store
-
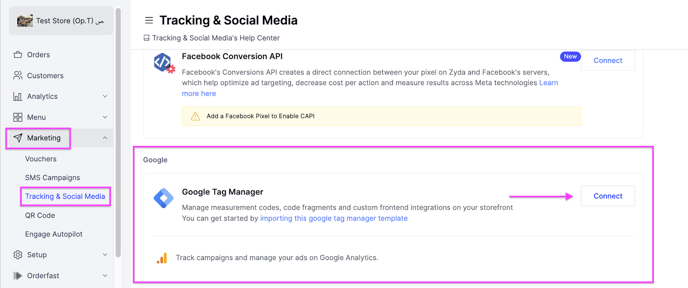
Go to Marketing and select Tracking & Social Media.
-
Paste the Tracking ID in the box under Google Tag Manager.
-
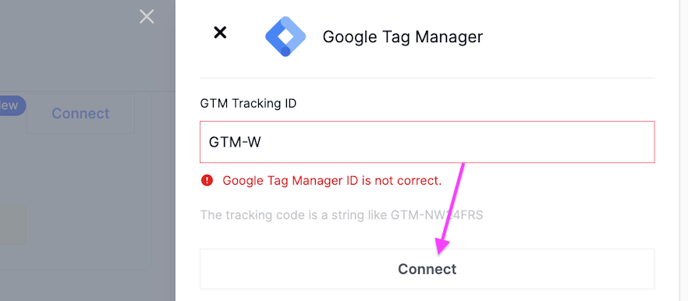
Click Connect. The dashboard checks the ID and shows a confirmation message.
Add Google Analytics 4
Import the template
-
Download the template: GA4 - Templates v4.json.
-
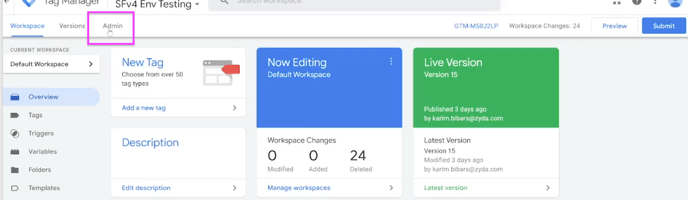
Go back to your workspace on tagmanager.google.com and click Admin.
-
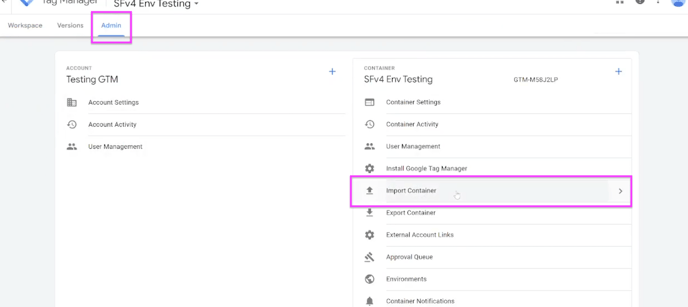
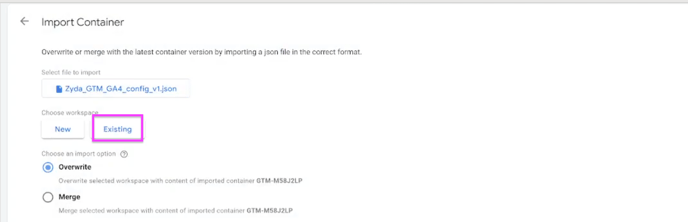
Click Import Container.
-
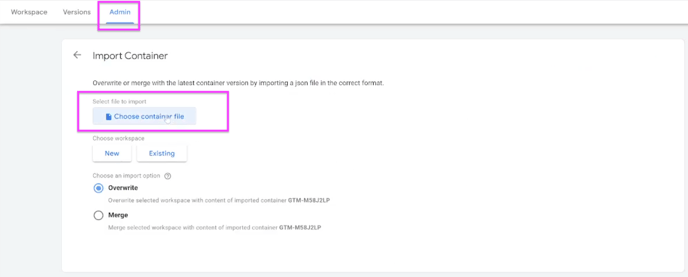
Select the file you downloaded, then click Existing.
-
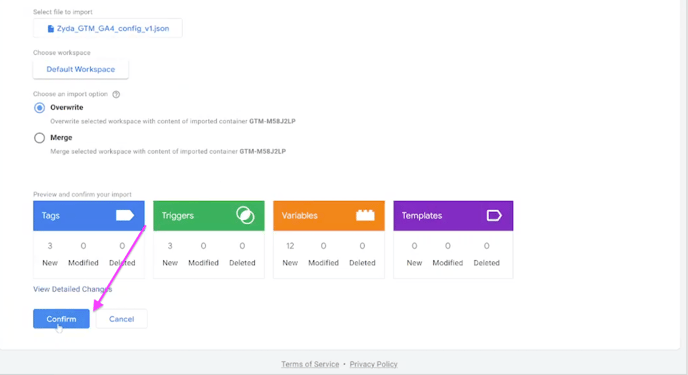
If you are asked to select a workspace, click Default Workspace.

-
Click Confirm at the bottom of the page.
-
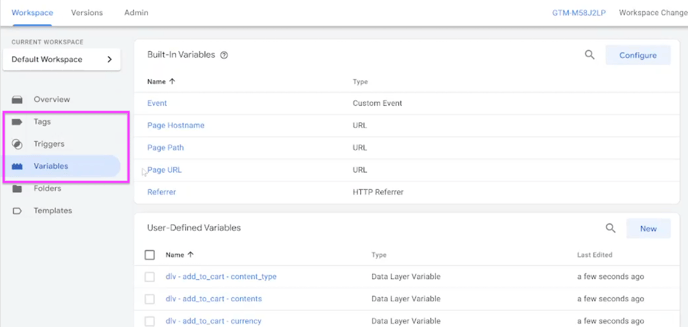
Go back to your workspace. The imported Tags, Triggers and Variables are now there.
Add your measurement ID
-
In Google Analytics, go to Admin and select Data Streams.
-
Copy the Measurement ID.
-
In Google Tag Manager, go to Variables and open GA4 Measurement ID.
-
Replace
ADD_YOUR_GOOGLE_ANALYTICS_4_CODE_HEREwith your measurement ID. Use a G-XXXXXXX property, not a Universal Analytics UA-XXXXX property.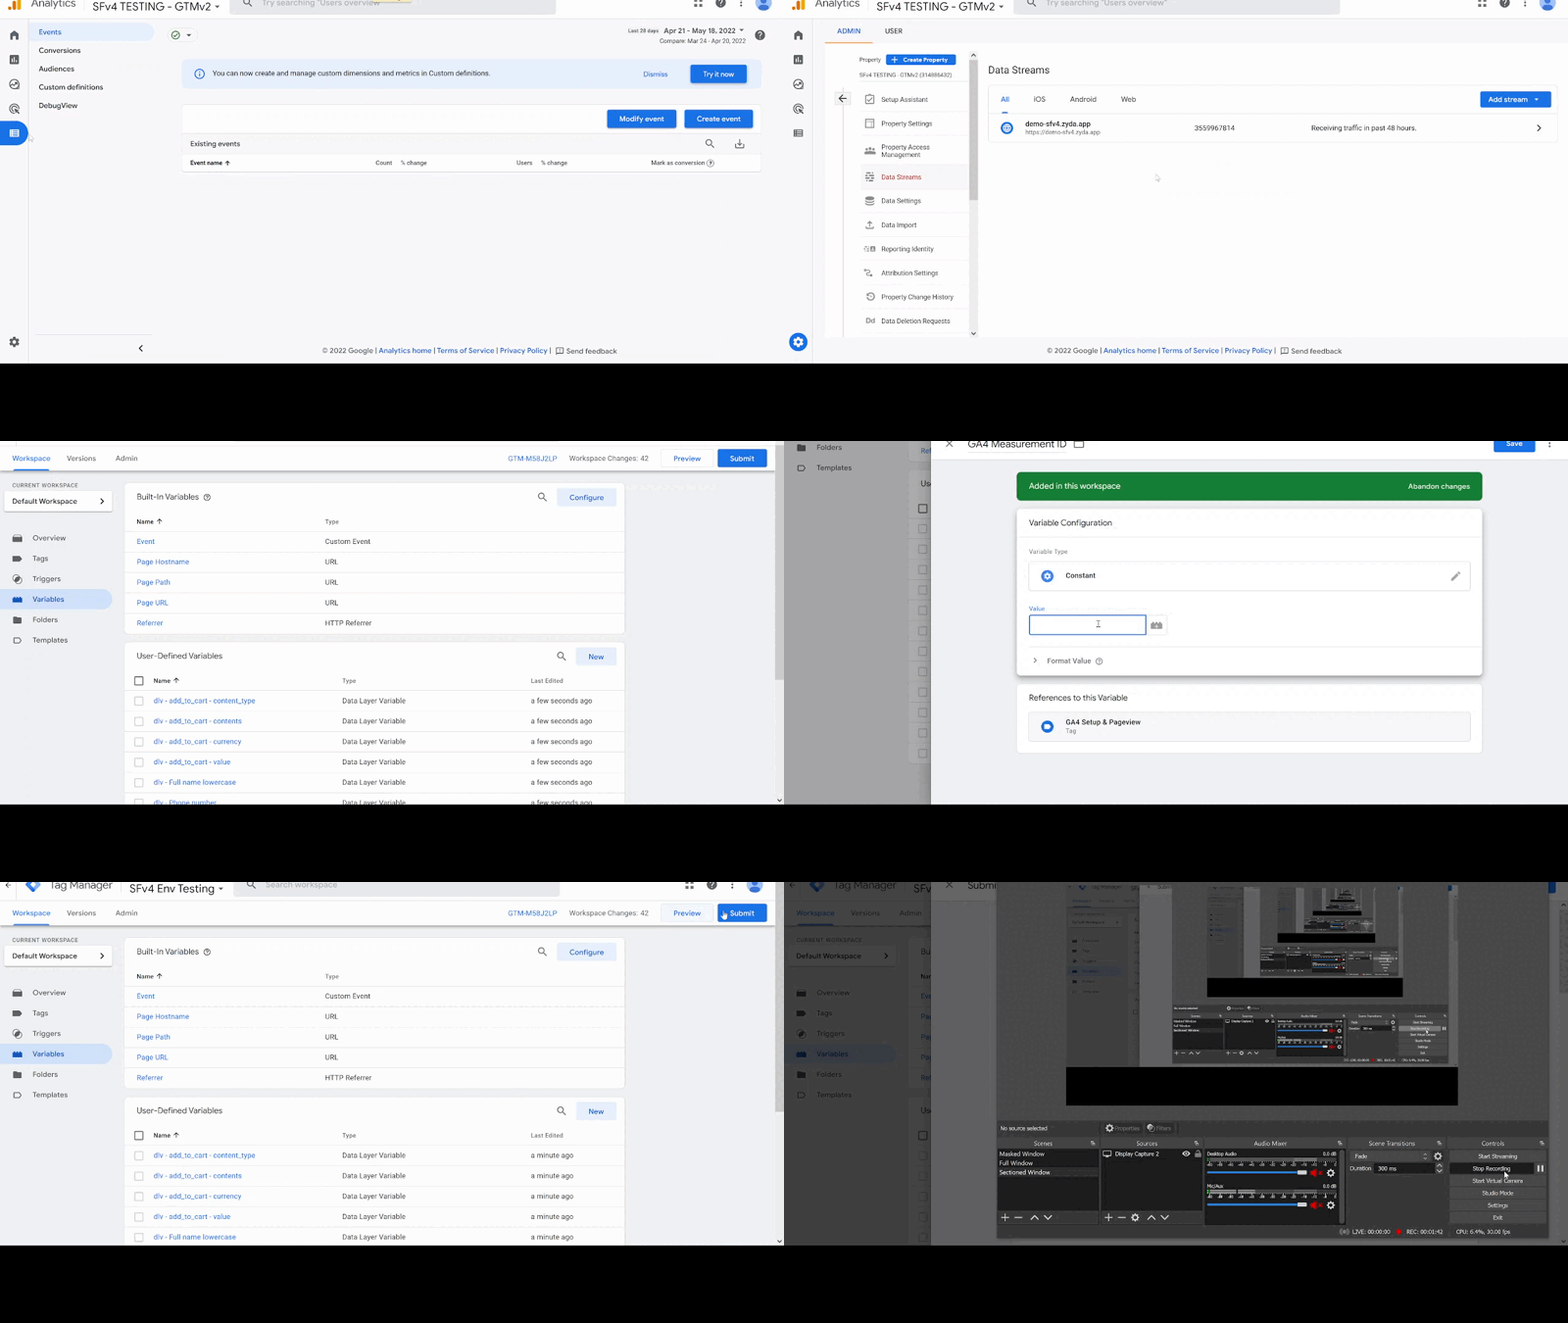
Publish
-
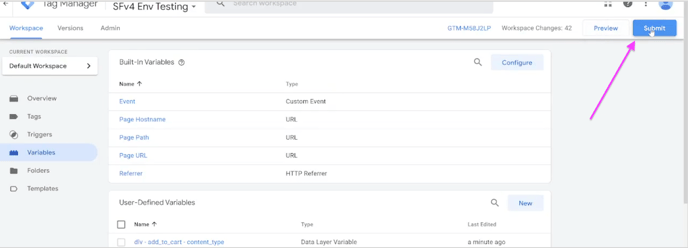
Click Submit.
-
Click Publish.

-
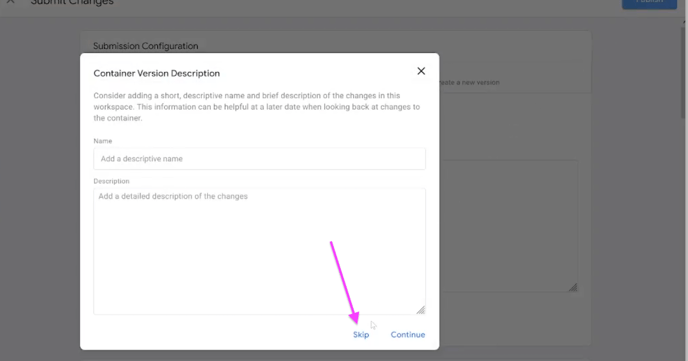
Click Skip.
Data starts to reach your Google Analytics 4 account within 48 hours. The Realtime tab in Google Analytics shows real-time data.
Best practice
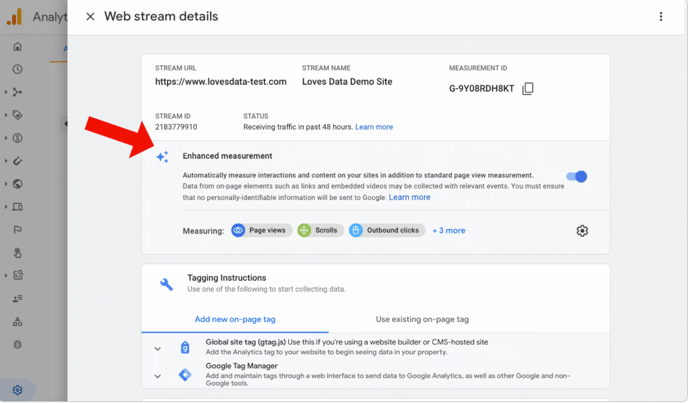
Turn off enhanced measurement so events are not counted twice. In Google Analytics 4, go to Property Settings, then Data Streams, click the stream, and turn off enhanced measurement.
You can now explore the other tag integrations and the community gallery.
Zyda's storefront is a single-page application. Tell the person setting up Tag Manager that page views may not always work. We suggest using our custom data layer event called
page_view.
To learn more about the data layer, read [Advanced] What data does Zyda push to the Google Tag Manager Data Layer.