Create a new item on your menu and choose where and how it sells. Owners and managers can do this.
If your store is integrated with Foodics, make menu changes in Foodics instead. Item names, prices, option groups and modifiers edited in Zyda will not reach your store.
Steps
-
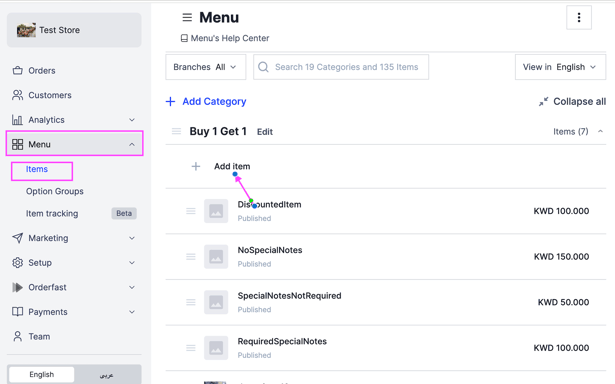
Go to Menu and select Items.
-
Select the category the item belongs to, then click Add Item.
-
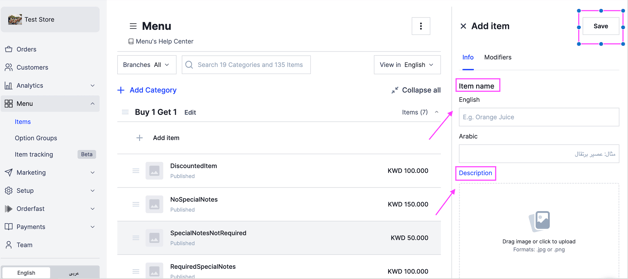
Fill in the item details, described below.
-
Click Save at the top right.
Info
- Item name — in English and in Arabic.
- Description — optional.
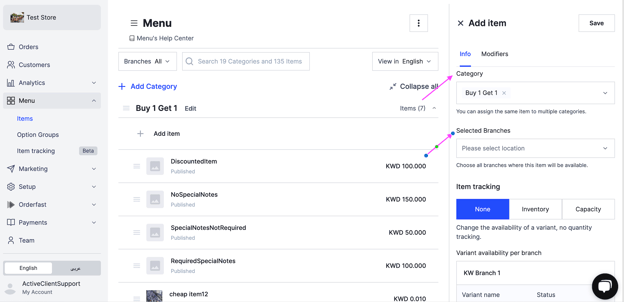
- Category — where the item appears on your menu.
- Selected branches — which branches sell it.
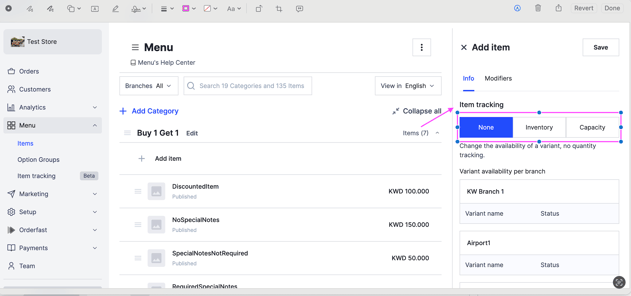
Item tracking
- None — always available until you change it yourself.
- Inventory — a fixed quantity. The item goes unavailable when it sells out.
- Capacity — a quantity that refills every day.
Modifiers
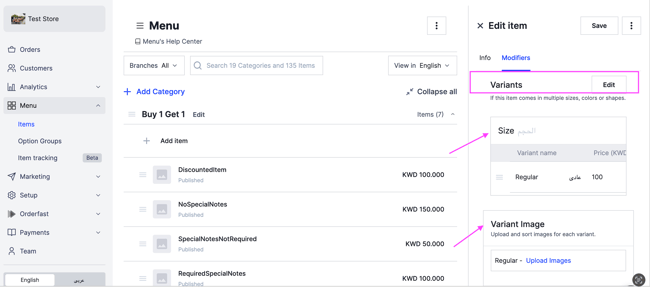
- Variants — sizes, colours or shapes, each with its own price.
- Variant image — a picture per variant.
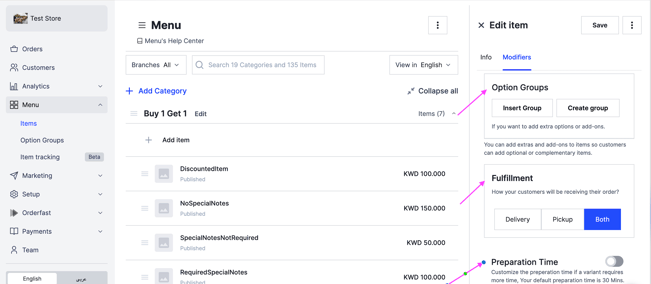
- Option groups — extras and add-ons.
- Fulfilment — delivery, pickup, or both.
- Preparation time — per variant, if it differs.
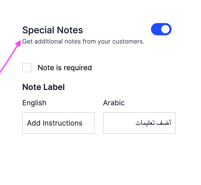
- Special notes — let customers type a note, optional or required.
Set special notes to required and customers cannot check out until they write one.
You can change the wording customers see above that box. It reads "Add Instructions" unless you replace it.