Add a banner or a popup to your website using Google Tag Manager and Popupsmart.

Before you start
- You need a Google Tag Manager account, connected on your Zyda dashboard. See Set up Google Tag Manager and Google Analytics 4.
- You need a Popupsmart account.
Steps
-
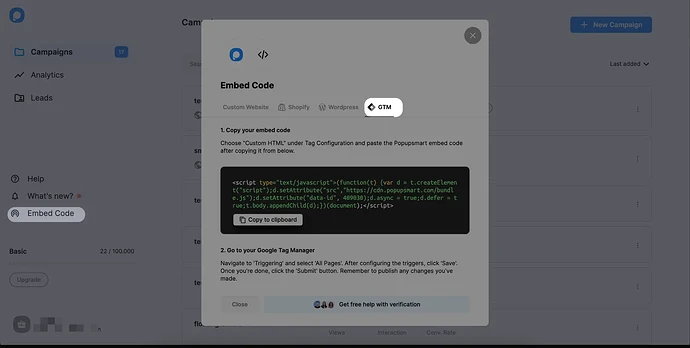
Log in to your Popupsmart account. Click Embed Code in the left sidebar, choose GTM as the category, then click Copy to clipboard.
-
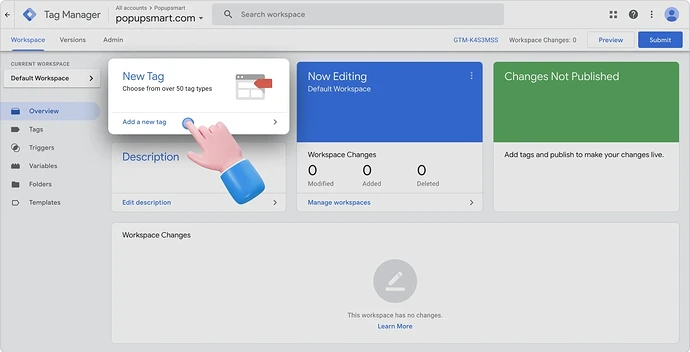
In another tab, go to your GTM account and choose Add a new tag.
-
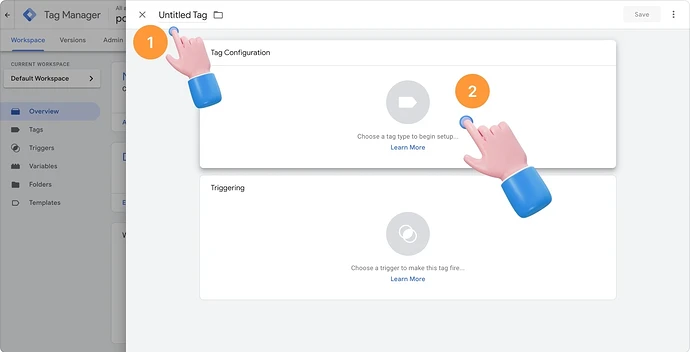
Name your tag in place of Untitled Tag, then click Tag Configuration.
-
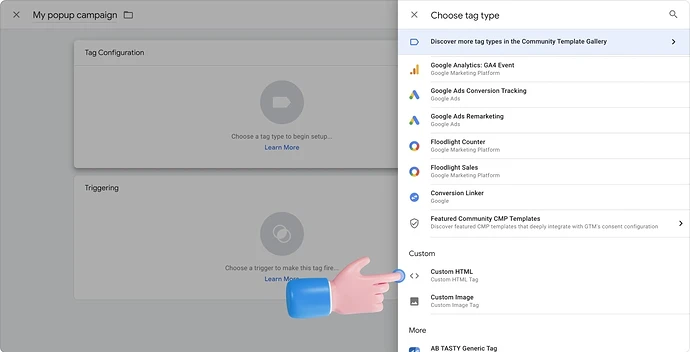
Choose Custom HTML.
-
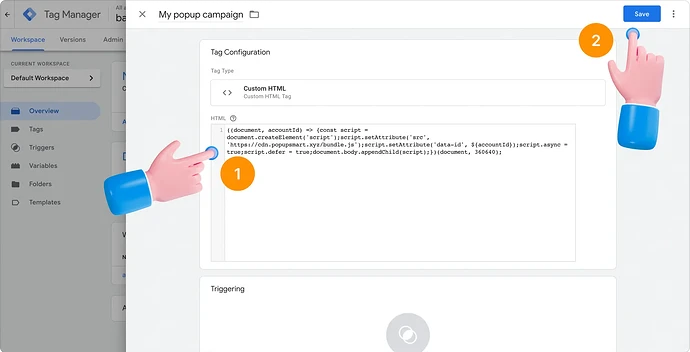
Paste your embed code into the empty HTML field.
-
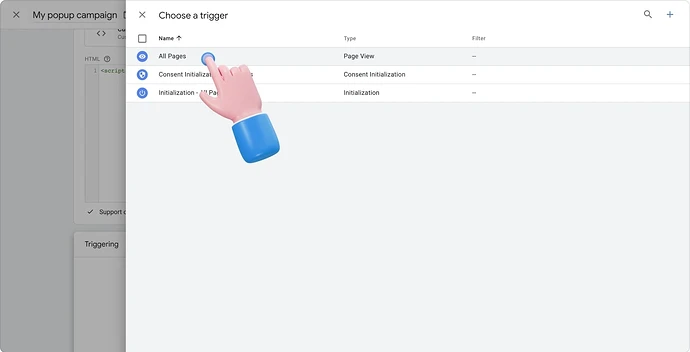
Scroll down, click Triggering, then choose All Pages. This makes Popupsmart work on all your pages.
-
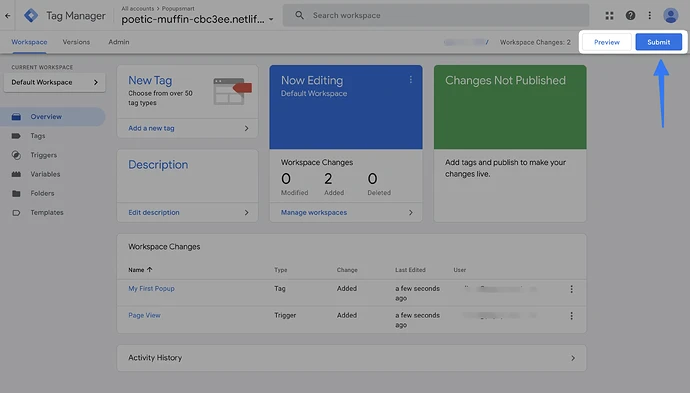
Click Submit.
-
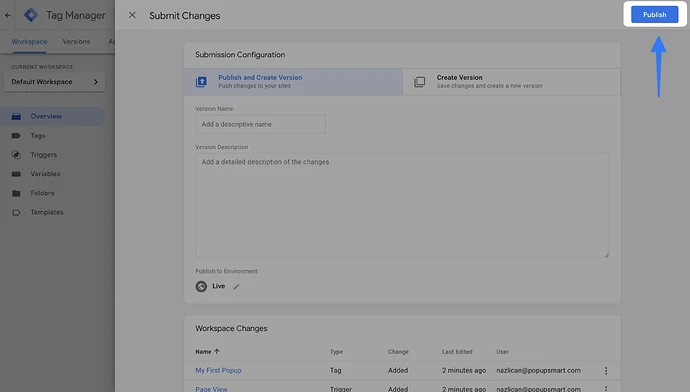
Click Publish.
Show the popup only on some pages
Use this if you want the popup on product pages only, so it does not interrupt people on your homepage or your blog.
-
In Triggering, choose Some Page Views instead of All Pages.
-
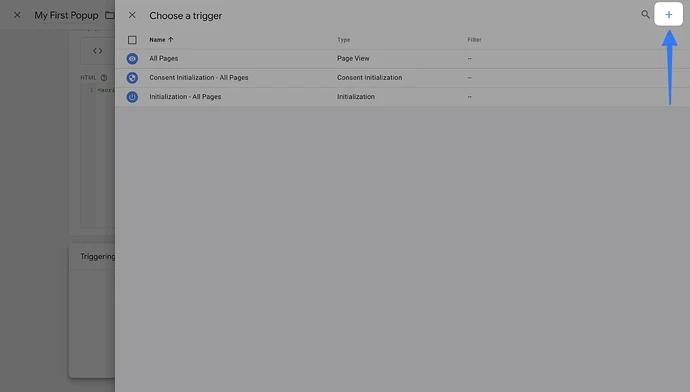
Click the + icon in the top right corner.
-
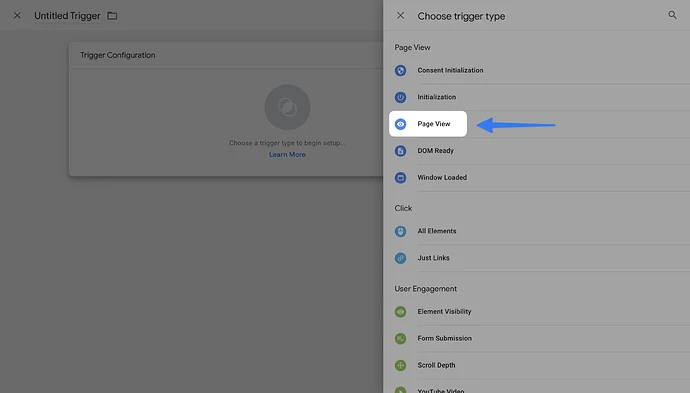
For Trigger Configuration, choose Page View as the trigger type.
-
Choose Some Page Views, set your conditions, then click Save. One rule you can use is: Page URL contains
/products/.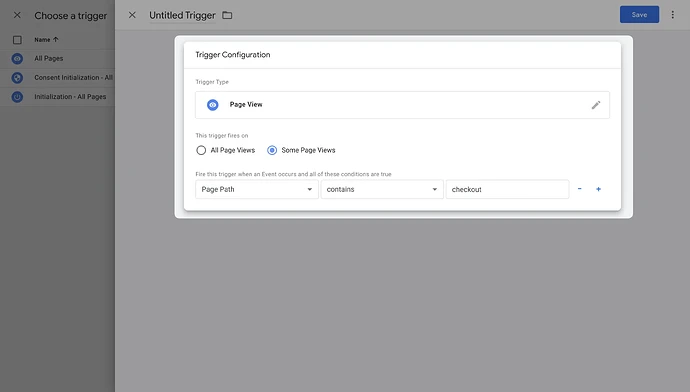
Popupsmart is script based, so it does not slow down page load. Publish the GTM container and clear your cache after you make changes.